The Perfect Pan Pizza Crust

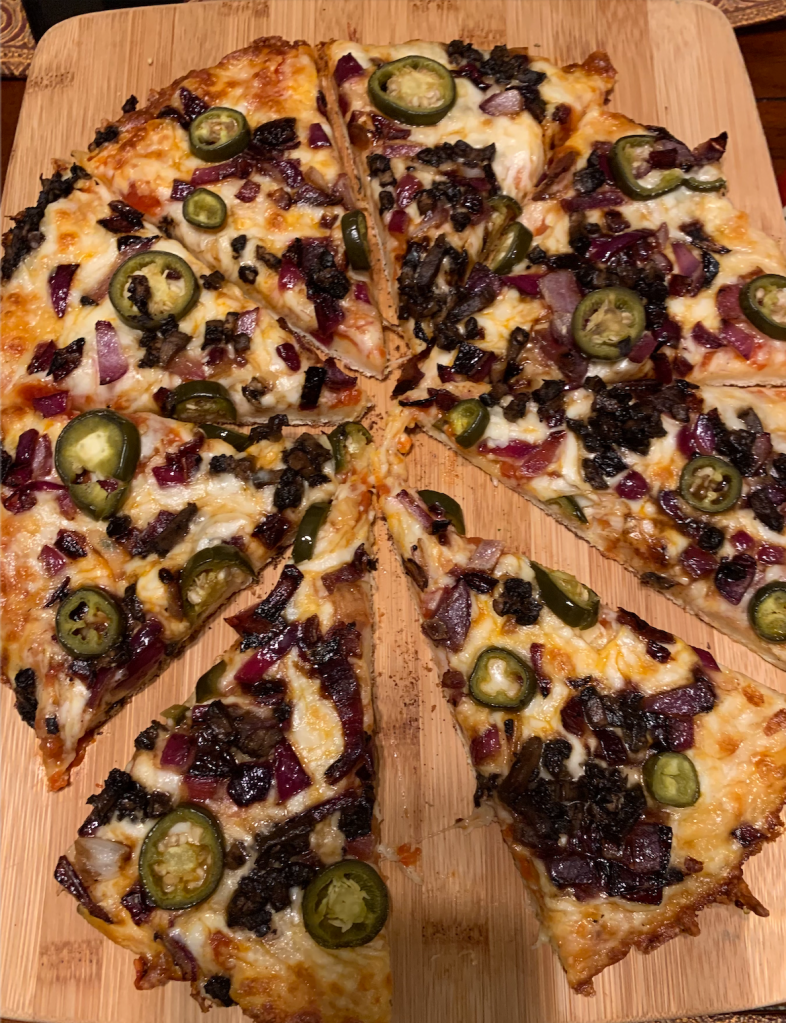
Getting the perfect pizza crust is probably the hardest part of making a pizza. Lucky my sister Neha is always the first to come up with the best pizza crusts!

Ingredients:

  • 1 cup bread flour/ all purpose flour
  • 1/2 tsp salt
  • 1/2 tsp sugar
  • 1/2 tsp dry yeast
  • 2 tsp olive oil
  • 1 tsp garlic powder (NOT garlic salt)
  • 1/2 cup milk

You want to combine all the ingredients and cover it up with cling wrap and let it rise for 2 hours- you can also put it in the fridge and let it ferment slowly over a few days.

Put a little olive oil in a cast-iron pan OR a non stick pan with an oven safe handle. Also add any seasonings and a tiny pinch of salt to the mixture and completely coat the pan with your hands. Now you want to put the dough I the pan (while your hands are oil) and stretch it to fit the pan. Leave it in the pan for 20-30 mins for a second rise (I skip this step if I don’t have time).

Put the stove on at medium heat and turn the oven on broiler. You want to cook the pizza dough on the pan for about 4 mins, until the bottom of the pizza starts to brown.

Add sauce edge to edge as well as the the tipping and mozzarella cheese. You want to broil for 2 minutes- or until it is brown to liking.

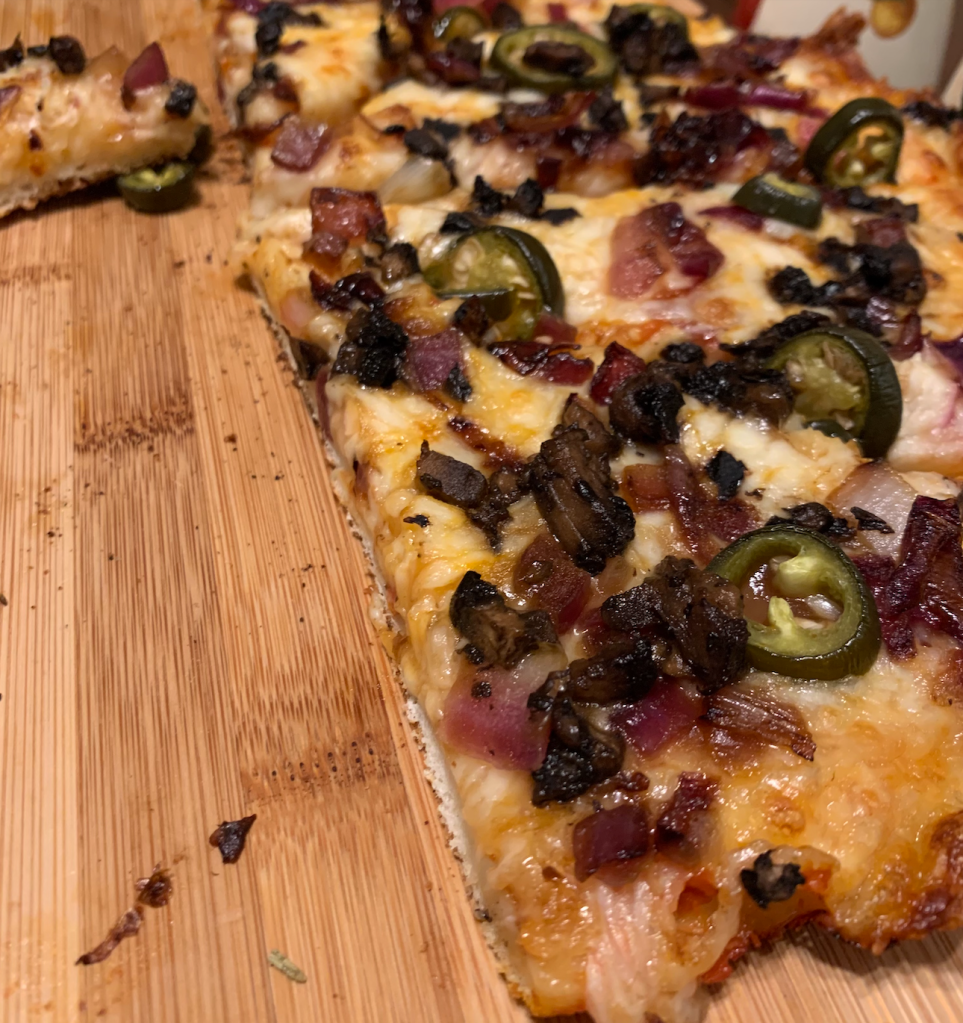
Now you want it to cool on a cooling rack before cutting and serving!

🖤

Rustic Apple Tart

Rustic Apple Tart

Ingredients:

  • 1 1/4 cups all purpose flour
  • 4 tbs unsalted butter
  • 1/4 cup shortening (4 tbs)
  • 4 tbs sugar
  • 1/4 tbs salt
  • 3-6 tbs ice water
  • 4 large apples
  • 2 teaspoons fresh lemon juice
  • 1/4 cup packed brown sugar
  • 1/2 tbs cinnamon
  • 1 tsp vanilla extract
  • 2 tablespoons granulated sugar
  • 1 egg
  • 1 table spoon confectioners sugar (powdered)

This is the BEST fall apple pie substitute I have ever made. Originally I wanted to try a peach tart but the peaches had gone bad so I had to find an alternative.

Tart crust: In a food processor combine: 1 1/4 cups all purpose flour, 4 tbs unsalted butter, 1/4 cup shortening (4 tbs), 4 tbs sugar, 1/4 tbs salt and add 3-6 tbs of iced water as needed. Put the dough in cling wrap and chill for an hour.

The filling: peel and thinly slice apples and add: 2 teaspoons fresh lemon juice, 1/4 cup packed brown sugar, 1/2 tbs cinnamon, 1 tsp vanilla extract.

Assembly: Roll the dough out on parchment paper and start adding the apples in a ring working your way towards the center. Then carefully roll the edges over the sides. Lastly you are going to brush the outside with egg white and sprinkle powdered sugar on the edges. You are also going to sprinkle granulated sugar on the apple portion. Preheat the oven to 350° and bake for 40-45 minutes until golden brown.

I pre made this earlier in the day to serve, but I would let the tart chill for an hour before cutting into it.

This is a great FALL dessert, you can also pair it with vanilla ice cream or a cup of freshly brewed coffee.

🖤

Mongolian Tofu Noodles

Ingredients:

  • 1 slab EXTRA FIRM TOFU: dry with a paper towel and cut into cubes
  • 1 tbs flour
  • 1-2  green bell pepper sliced into thin strips
  • 3 packets of ramen noodles (uncooked)
  • 2 tbsp sesame oil
  • 3/4 cup soy sauce low sodium
  • 1 1/4 cup chicken broth low sodium, or no sodium added
  • 4 cloves garlic minced cloves garlic minced
  • 2/3 cup brown sugar packed
  • 1/4 tsp red pepper flakes
  • 2 tbs minced ginger
  • 3 green onions chopped (optional garnish)
  • black sesame seeds (optional garnish)
  1. Take the diced tofu and toss it in flour: bake it at 350° on a greased pan until it gets crispy. I just kept an eye on it and baked it for 20-30 minutes.
  2. Make the sauce: cook the minced garlic and ginger in sesame oil and add soy sauce+ chicken broth+ chili flakes (you can add more if you want) + brown sugar. Reduce heat and let it cook for 20-30 minutes until it thickens. I didn’t use all the sauce only about half for this dish- I stored the rest to use later.
  3. Sauté the green pepper in oil and put aside
  4. Cook the ramen. I just add the uncooked ramen to a mixing bowl and add boiling water over it and mix around for about 1 minute and strain- this prevents the noodles from getting overcooked.
  5. Mix the crispy tofu + sautéed green pepper + noodles together top with green onions and black sesame seeds (or regular sesame seeds) and enjoy

🖤

Homemade Cinnamon Buns

I made my cinnamon buns in a cast-iron pan but you can make it in any pan you would like.

Ingredients:

  • 3/4 cups milk
  • 1/3 cup butter
  • 1/4 cup sugar
  • 1/2 tsp salt
  • 1 package (2 1/4 tsp) active quick rise yeast
  • 1 egg
  • 1/4 tbs softened butter
  • 3/4 cup brown sugar
  • 2 tbs cinnamon
  • 1/4 cup heavy cream

Icing: 5 tbs powdered sugar+ 1 tbs milk (whole or 2%) you can add more less milk depending on how thick you want the glaze, you can also make a cream cheese icing if you want.

In a sauce pan over low heat bring together: milk + butter, remove from heat once the butter is melted. In a mixing bowl combine 2 1/4 cups flour + sugar + salt + yeast mixture ( packet of yeast + 4 tbs warm water + 1 tsp sugar) + milk mixture (milk + butter from the last step) + egg. Kneed the mixture while slowly adding in the remaining 1 cup of flour (I used my hand but you can also use a mixer). Let the dough rest for 10 minutes and preheat the oven to 350° and turn off once preheated and wait 10 minutes. Put the dough in the warm oven for 20-30 minutes for the dough to rise. On a floured surface, roll out dough into a rectangle. Spread softened butter on top and add the cinnamon + brown sugar mixture. Cut into strips and roll them. Place them in a buttered cast-iron pan and drizzle heavy cream over them before baking them (this keeps them super moist). Turn the oven back onto 350° and bake for 15-20 minutes until golden brown. Drizzle icing over the baked cinnamon rolls and serve!

This recipe made 2 cast-iron pans worth of cinnamon rolls- so you can most definitely half the recipe if you want!

Storage: up to 2 days at room temperature OR 5 days in the refrigerator, you can also freeze them ( I suggest freezing them without glaze and adding the glaze when serving)


🖤

Marinated & Grilled Portobello Mushroom Burger

Described on the menu as: Marinated and Grilled Portobello Mushroom, Roasted Tomato Jam, Lemon Aioli, Arugula, Crispy Onion Strings I decided to make the knock off version.

Ingredients:

  • portobello mushrooms
  • tomatoes
  • fresh basil
  • honey
  • salt/ pepper
  • butter
  • olive oil
  • lemon/ lemon zest
  • mayonnaise
  • red wine vinegar
  • chili flakes
  • minced garlic
  • dill (fresh or dry)
  • arugula
  • fried onions
  • burger buns of choice

Portobello mushroom marinate: butter+ olive oil (what ever ratio you prefer- I do more olive oil less butter)- total 8 tbs in whatever ratio, 2 cap full of red wine vinegar+ lemon zest + chili flakes

Tomato Jam: Tomatoes + fresh basil + honey to taste+ salt/pepper to taste + minced garlic

Lemon aioli: Mayonnaise + salt + fresh lemon juice + minced garlic + dill + lemon zest (I never really measure the ingredient for my aioli sauce I just add stuff until I get it to taste perfect)

Marinate burgers in the above marinate, generally speaking you want it to marinate for at least 5-6 hours, if you don’t marinate it long enough then you won’t get the right flavors in the burger it self.

You then want to grill the marinated burgers on a low heat about 3-5 minutes on both side without letting the mushroom to burn. The mushrooms will significantly shrink- so you want to use the biggest ones you find when picking a size so they shrink down to the size of a burger bun.

Lastly assemble the burger, grill the bun put down the aioli sauce add the grilled burger top it with the tomato jam, arugula and fried onions and enjoy!

🖤

Mushroom Ramen

Ingredients:

  • 1 container chicken broth/ veggie broth
  • Assorted mushrooms of choice (3/4 lb)
  • Dried shiitake mushrooms (optional- these are very strong
  • 3-4 ramen packets
  • 1 large onion
  • 1 tbs fresh ginger/ ginger paste
  • 1-2 garlic cloves (minced)
  • Garlic powder (unsalted)
  • Sesame seeds
  • Miso paste
  • Soy sauce
  • 4 eggs
  • Green onions/ scallion (garnish)
  • Corn (fresh or frozen)
  • Butter
  • Red chili flakes
  • Sesame oil (optional)

1. Prepare the toppings

Soft boiled eggs→ bring water to a boil, put in the eggs, boil for 6 minutes, take out and put in a ice water bath, peel and cut in half

Chili garlic sesame oil → heat sesame oil (or vegetable oil), add chili flakes, sesame seeds and garlic powder stir (don’t bring it to a boil or it will burn)

Butter corn → heat the corn and add butter

Cook ramen →boil water, put boiling water into a large bowl, add ramen and let sit for 2-3 minutes. Rinse with cold water (you don’t want to overcook the ramen noodles)

2. Prepare the broth

Sauté the garlic, ginger and onion in oil until the onion shrinks. Add the broth of choice, chopped mushrooms, soy sauce (to taste) and miso paste (to taste). Bring to a boil, I cook it on low heat for 20-30 minutes.

3. Assemble and serve

Put the broth in a bowl, add the ramen end with toppings of choice and serve. You don’t want to add the noodles until the end or they will get soggy. You can always modify your toppings and get creative by adding: spicy miso paste, fried shrimp or tofu, meat of choice, takana, spinach, kimchee, bamboo, seaweed, bean sprouts ect.

🖤

Knock off Lou Malnati’s Deep Dish Pizza (Lou’s Special)

Knock off Lou Malnati’s Deep Dish Pizza (Lou’s Special)

I used a Lodge Cast Iron pan to make the deep dish pizza

Pizza dough ingredients:

  • 4 tsp sugar
  • 2 tbs active dry yeast
  • 1 1/2 cups warm water
  • 4 cups all purpose flour (or bread flour)
  • 3 tsp salt
  • 5 tbs vegetable oil

Other ingredients:

  • 1 1/2 shredded mozzarella cheese
  • Fresh mozzarella cheese
  • Colby jack cheese
  • 2 1/2 fresh spinach (chopped up)
  • 5 cloves of garlic (crushed/ minced)
  • 1 cup pizza or pasta sauce (you can also make your own like I did)
  • Butter

1. Prepare the Dough

Mix together 1 1/2 cups of warm water, 2 tbs active dry yeast and 4 tsp sugar and and let it sit for 3-5 minutes until it foams up/bubbles (this means that the yeast has activated- if you don’t get foam/ bubble you will have to repeat this step or your dough will not rise). Once the yeast is activated, add 5 tbs of vegetable oil into the mixture- this is your wet mixture.

Mix the dry ingredients together- 4 cups of flour and 3 tsp salt. Slowly incorporate your wet mixture into your dry mixture until all the ingredients come together. Kneed the dough for about 10 minutes or until the dough is smooth.

Let the dough rise until the dough doubles in size- you want to place the dough in a warm dry area to rise or in a warmed oven (turn the oven on for a few minutes and turn it off).

2. Assemble the Pizza

Preheat the oven to 425°F. Once the oven is preheated, heat the empty cast iron pan (12″) in the oven for 3 minutes. Once the pan in heated, butter the pan. Take 1/2 of the prepared dough, form a ball and place it in the center of the pan. Slowly press the dough into the pan and up the edges until the dough is uniformly spread. Lightly butter and salt the open face of the dough, and put it back in the over for 3 minutes.

Remove from the oven, put down a layer of shredded mozzarella cheese, top with fresh mozzarella cheese, layer of spinach mixture (sautéed garlic, spinach, salt until the spinach shrinks and squeeze out excess moisture once it cools), add a layer of sauce, top with a mixture of mozzarella and colby jack cheese, at the end add thinly sliced tomatoes (lightly salt the tomato slices).

3. Cook the Pizza

Cook the pizza at 425°F for 20 minutes or until golden brown. Take the pizza out of the oven and let it cool before using a spatula to remove it from the cast iron pan- this should be very easy since he pan was buttered. Optional step: put the pizza back into the oven for 3-5 minutes to become crispy.

Homemade Deep Dish Pizza

🖤

Fluffy Cloud Japanese Pancakes

Ingredients:

  • 1 1/2 cups all-purpose flour
  • 3 tablespoons confectioners’ sugar
  • 2 teaspoons baking powder
  • 1/2 teaspoon kosher salt 
  • 1 1/4 cups milk 
  • 4 tablespoons unsalted butter, melted and cooled
  • 1/2 teaspoon pure vanilla extract
  • 1 large egg yolk plus 3 large egg whites
  • 1/4 teaspoon cream of tartar
  • PAM- for cooking
  • Maple syrup- for serving
Special equipment:

 four 3-inch-wide-by-2 1/2-inch-high ring molds: you can use any tall ring you have

This was my first time trying homemade Japanese pancakes and I was pleasantly surprised! They turned out amazing! The easiest way to make this pancake, start with THREE BOWLS!

Bowl 1: Mix together the dry ingredients: flour, confectioners’ sugar, baking powder and salt

Bowl 2: Mix together the wet ingredients: milk, melted butter, vanilla and egg yolk

Bowl 3: Mix 3 egg whites with a hand mixture until white peaks form (this takes about 3-5 minutes depending on the hand mixer

Mx together the contents of bowl 1 and bowl 2 in equal proportions, at the end fold in the contents of bowl 3

Heat up a pan on LOW HEAT- I had it on the lowest setting, spray the pan and the ring. Once the pan is heated pour the batter in 1/2 way into the mold, set a timer for 5 mixtures, flip and cook the other side for 5 more minutes.

Once it’s done pop it out of the mold and top with powder sugar ( confectioners’ sugar). Serve with fresh fruits, whipped cream, and maple syrup!

🖤

Air Fryer Zucchini

Ever wish you could have yummy warm fried zucchini without the guilt of eating deep fried food? Now there is a solution! I LOVE my air frier- I can honestly say, most of the things I make in there actually taste fried! I recently upgraded to the GoWise Air Frier and have no complaints.

Ingredients: 

  • Zucchinis (thinly sliced, I use a Nutri Chopper to make long thin slices)
  • 6-8 oz of soda water
  • ½ cup all purpose flour
  • 4 tbs cornstarch
  • 1 tsp Kosher salt
  • ¼ tsp black pepper
  • ¼ tsp garlic
  • ¼ tsp oregano
  • 3-4 cups panko
  • 1 Tbsp Parmesan cheese
  • 1 Tbsp Romano cheese (optional- I don’t always have this cheese on hand)
  • ½ tsp chopped parsley (optional)

The secret ingredient is the soda water- this makes the zucchini very crispy after it comes out of the air frier!

Combine ½ cup flour, 4 tbs cornstarch, ½ tsp kosher salt, ¼ tsp pepper, ¼ tsp oregano, ¼ tsp garlic (I use dry unsalted garlic), and add to 6 oz soda water and whisk together – do not over-mix (you don’t want the soda water to lose all of its carbonation. Batter should be the consistency of thin pancake batter- if it is too thick, soda water can be added.

Next step, dip the zucchini slices in the batter, then into the panko. Lay all the zucchini on a baking sheet until you are ready to air fry it.

Air fry the zucchini at 400F for 10 minutes, or until the zucchini is crispy- I think the cook times depend on the type of air frier used! Garnish the zucchini with the Parmesan cheese, Romano cheese and chopped parsley. I promise they will be the BEST you have ever tried!

Personally, I love to pair the zucchini with lemon aioli sauce.

Ingredients: 

  • ½ cup sour cream
  • ½ cup of mayonnaise
  • 1 lemon- juice and zest to taste
  • 1 tbs olive oil
  • 1 tbs finely chopped parsley
  • 1 tbs finely chopped chives
  • 2 cloves of chopped garlic
  • ¼ tsp dry mustard
  • salt & pepper to taste

Combine all the ingredients together, and serve with the warm air fried zucchini! ENJOY!

🖤

Thai Salad with Air Fried Shrimp

Thai Salad with Air Fried Shrimp

We just got an air fryer and I was super excited to use it. The first thing we made with it was shrimp which turned out amazing! We have a GoWise air fryer, I linked the exact one we have.

To make the salad use the following ingredients, I just eyeballed how much of each ingredient I wanted to use and chopped everything up:

  • Napa Cabbage
  • Red Cabbage
  • Shredded carrots- I just bought a pre shredded bag to save time
  • Red bell pepper
  • English Cucumber
  • Cooked Shelled Edamame- I bought it frozen and cooked it in a microwave safe bowl for 4.5 minutes
  • Scallions
  • Cilantro
  • Peanuts- I used roasted unsalted peanuts
It almost looks too pretty to eat!!!

After you chop everything up, don’t add the dressing until you are going to serve the salad. You can also store the salad overnight and add dressing the next day. This is a great recipe for meal prep! I paired my salad with homemade peanut dressing. In a blender blend together the following ingredients:

  • 1/4 cup creamy peanut butter
  • 2 tablespoons unseasoned rice vinegar
  • 2 tablespoons lime juice
  • 3 tablespoons vegetable oil
  • 2 tablespoons honey
  • 1 tablespoon soy sauce
  • 2 1/2 tablespoons sugar
  • 2 garlic cloves
  • 2 tablespoons fresh ginger
  • 1/4 teaspoon (or to taste) red pepper flakes
  • 2 tablespoons fresh cilantro

I added some water to dilute the dressing, I also tasted it at the end, and ended up adding a little more ginger and soy sauce. I used the small attachment to my ninja to avoid having to clean the whole blender when I was done.

The last step is to air fry the shrimp. I peeled and cleaned the shrimp, I suggest fresh shrimp as opposed to frozen shrimp. I then breaded the shrimp in the following order: flour–> egg wash –> panko and stuck it in the air fryer. I sprayed the breaded shrimp lightly with avocado oil. The key things are time and temperature when cooking in the air fryer. I cooked it at 400 degrees for 8 minutes. About half way through, I pulled out the bucket and shook the shrimp around. This meal took about 20 minutes to make, the longest part was cutting the vegetables!

As you can see, the shrimp turned out crispy and delicious!

🖤